Every week on our production floor, we see buyers zoom in on photos before they ever ask about a spec sheet CNC machining 1. The visual details tell the real story.
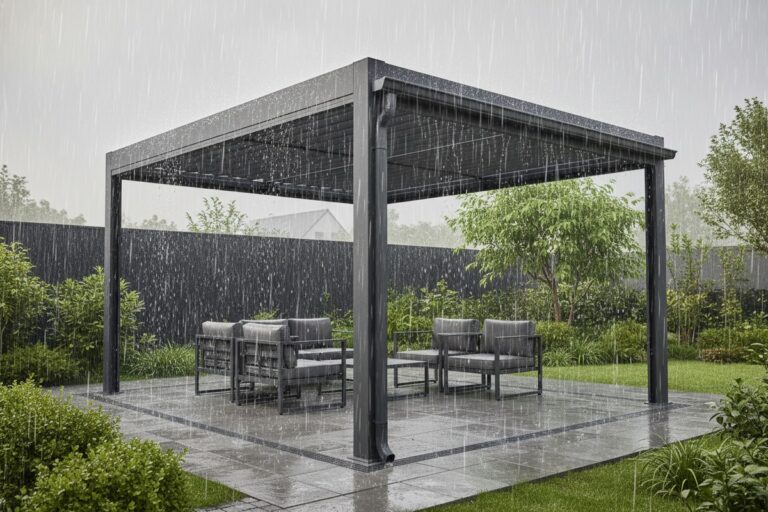
The 10 visual details that matter most when sourcing aluminum pergolas include powder coating consistency, wall thickness indicators, joint precision, louver alignment, drainage concealment, hardware finish matching, color depth, surface texture, accessory integration, and proportional harmony with the installation site. These cues predict long-term durability and aesthetic performance.
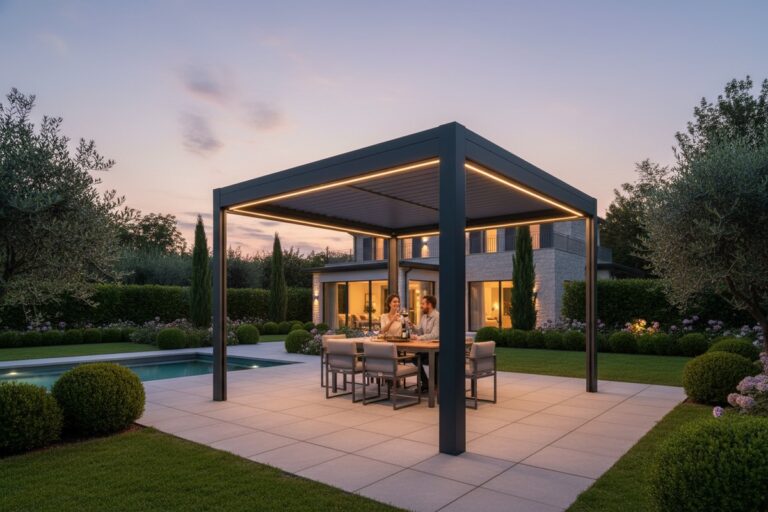
Most sourcing guides jump straight to dimensions, load ratings, and price per square meter. Those numbers matter, but they only tell half the story. What separates a pergola that still looks sharp after five years from one that disappoints within months often comes down to craftsmanship you can see with your eyes. In the sections below, we walk through the visual checks that our most experienced European buyers rely on, the ones that save them from costly returns, installation delays, and unhappy end customers. Whether you are a contractor, a distributor, or a purchasing manager comparing factory samples, these ten details will sharpen your eye and protect your investment.
How can I tell if the powder coating on my aluminum pergola will resist fading and peeling?
Over the past 25 years of running our coating lines, we have seen the full range of finish failures, from chalking after one summer to peeling at the first coastal installation. The problem is real, and it starts with what you can see.
A durable powder coating looks perfectly even, smooth, and consistent across every surface. Check for orange peel texture, streaking, color variation between parts, visible overspray, and thin spots near edges. These flaws signal poor preparation or application and predict early fading, chalking, and peeling in outdoor conditions.

What Does a Good Coating Actually Look Like?
A premium powder-coated surface feels uniform to the touch and looks uniform to the eye. powder coating 2 When you hold a profile under natural light and tilt it slowly, the reflection should move smoothly across the surface without bumps, waves, or dull patches. If you see a slight dimpled texture that looks like orange skin, that is called "orange peel." It means the powder was applied unevenly or cured at the wrong temperature. A small amount is sometimes acceptable in industrial settings, but for architectural pergolas sold to homeowners and hotels, it looks cheap.
Key Flaws to Spot in Photos and Samples
When our QC team inspects coated profiles, they follow a specific visual checklist. Here is a simplified version you can use yourself:
| Visual Flaw | What It Looks Like | What It Means |
|---|---|---|
| Orange peel texture | Dimpled surface like citrus skin | Uneven powder flow or incorrect cure temperature |
| Color inconsistency | Slight shade difference between posts and beams | Batch mixing error or different coating runs |
| Thin spots near edges | Lighter color or visible substrate at corners | Insufficient powder coverage, prone to early corrosion |
| Overspray | Rough, gritty patches on non-coated areas | Poor masking during application |
| Streaking | Visible lines or drip marks on vertical surfaces | Incorrect gun distance or speed |
| Chalking | Powdery residue when you rub the surface | UV degradation from low-quality powder resin |
Why This Matters for Long-Term Performance
A poor coating does not just look bad. It exposes the raw aluminum underneath to moisture, salt air, and UV radiation. In coastal cities across Italy, Spain, and southern France, we have seen inferior coatings fail within 18 months. Our standard process uses a chromate-free pretreatment 3 followed by a minimum 60-micron polyester powder coat 4, tested to QUALICOAT standards 5. That is the kind of detail you can verify by requesting a coating thickness report alongside the visual inspection. But the eyes come first. If the finish looks wrong, the lab report will not save it.
One Viewpoint Worth Considering
Some buyers argue that function matters more than finish perfection. A pergola that performs well structurally might justify a less-than-perfect coating. That is fair for budget projects. But for mid-to-high-end distribution, your end customer will notice. And once a coating starts to fail, the maintenance cost erases any initial savings.
What visual signs should I look for to verify the aluminum wall thickness meets my safety requirements?
When we ship pergolas to European contractors, one of the first things they check is whether the profiles feel solid. A thin-walled extrusion can pass initial visual inspection in a catalog photo but fail under real wind and snow loads 6. The danger is invisible until it is too late.
To visually verify aluminum wall thickness, examine cut ends of profiles for the visible cross-section, compare beam proportions against stated dimensions, and look for flex or bowing in long spans. Heavier-looking posts with wider flanges and thicker visible edges indicate stronger structural extrusions that meet wind and snow load safety standards.

Reading the Cross-Section
The most direct visual check is looking at the cut end of a profile. aluminum wall thickness 7 When our factory ships samples, we always include one unfinished cut piece so buyers can see the wall thickness with their own eyes. A quality pergola post typically has a wall thickness between 2.0 mm and 3.0 mm, depending on the span and load requirements. If the wall looks paper-thin at the cut edge, that is a warning sign.
Proportional Cues That Signal Strength
You do not always have access to a cut sample. In product photos and showroom displays, proportion is your next best clue. A sturdy post usually measures at least 150 mm × 150 mm for a freestanding pergola spanning 3 to 4 meters. Beams should look proportionate to the posts, not noticeably thinner or narrower.
| Component | Typical Strong Profile | Potential Weak Profile |
|---|---|---|
| Main posts | 150 × 150 mm, wall ≥ 2.0 mm | 100 × 100 mm, wall < 1.5 mm |
| Primary beams | 200 × 100 mm, wall ≥ 2.0 mm | 150 × 60 mm, wall < 1.5 mm |
| Louver blades | Extruded with internal ribs | Flat sheet without reinforcement |
| Gutter channels | Integrated into post profile | Clip-on external gutters |
The "Chunky vs. Clean" Balance
Here is where a common misconception arises. Some buyers assume that bigger always equals better. That is not always true. An oversized, heavy-looking pergola can overwhelm a small terrace and look out of place. The best designs balance structural integrity 8 with visual elegance. Our engineering team works to keep wall thickness where it needs to be for safety while maintaining clean, modern lines that suit high-end residential and hospitality projects.
Flex and Bow Tests
If you visit a showroom or receive a sample beam, hold it horizontally at both ends and observe any sag in the middle. A 3-meter beam with adequate wall thickness should show minimal deflection under its own weight. Visible bowing suggests thin walls or soft alloy. This is a simple, practical test that any buyer can perform without instruments.
A Cautionary Note
Marketing terms like "aerospace-grade aluminum" sound impressive but tell you nothing specific about wall thickness or structural design. Always ask for the extrusion drawing with dimensions. If a supplier will not share it, that silence speaks louder than any marketing claim.
How do I inspect the precision of joints and connectors to ensure my installation goes smoothly?
In our experience exporting to European markets, the single biggest source of installation complaints is not missing parts or wrong dimensions. It is joints that do not fit cleanly. A misaligned connector can add hours to an install, and the final result never looks right.
Inspect joints by checking for uniform gaps, flush alignment between connected profiles, clean weld beads without blobs or grinding marks, and consistent connector fitment across all sample pieces. Tight, even joints signal precise CNC machining and careful assembly, which directly predict smooth on-site installation and a professional finished appearance.

What Clean Joints Look Like
A well-made joint between two aluminum profiles should show a hairline seam or no visible gap at all. The two surfaces should sit flush. There should be no step between them, no visible adhesive squeeze-out, and no uneven shadow lines. When profiles meet at a corner, the miter should be tight and the weld bead (if visible) should be smooth and evenly ground.
Weld Quality Under Close Inspection
Not all pergola joints are welded. Many use mechanical connectors. But where welds exist, especially on beam-to-beam intersections or decorative elements, they reveal a lot about the factory's capability. Here is what to compare:
| Weld Characteristic | Good Sign | Bad Sign |
|---|---|---|
| Bead consistency | Uniform width and height along entire seam | Irregular blobs, thin spots, or gaps |
| Surface after grinding | Smooth, blended into surrounding surface | Visible grind marks, rough patches, divots |
| Color match after coating | Weld area matches surrounding finish | Weld area shows different texture or color |
| Alignment | Connected profiles sit perfectly flush | Visible step or offset between joined pieces |
Mechanical Connectors and Hidden Brackets
Many modern pergola systems use hidden brackets, internal splines, or bolt-and-pin connections instead of welding. This approach allows for flat-pack shipping 9 and faster field assembly. When you inspect these connectors, look for tight tolerances. The bracket should slide into the profile channel without excessive force and without wobble. If a connector rattles loosely inside the profile, the final assembly will have visible gaps.
Why Precision Predicts Installation Speed
Our contractors in Italy and Germany have told us the same thing repeatedly: when joints fit perfectly at the factory, the pergola goes up in hours, not days. Every millimeter of slop at a joint compounds across the structure. A 1 mm gap at each of eight joints can mean the louver rail is 8 mm off by the time you reach the far end. That misalignment creates binding, uneven louver movement, and visible daylight gaps. It is a cascading problem.
Request Assembly Mockup Photos
One practical tip: ask your supplier for photos of a partially assembled unit on the factory floor. Not just beauty shots of the finished product, but mid-assembly photos showing how joints come together. At our facility, we routinely share these with buyers. It builds trust and reveals craftsmanship that polished marketing images can hide.
The Photo Inspection Trap
A beautifully lit product photo can mask joint issues. Soft lighting smooths out imperfections. Angles hide misalignments. Always ask for close-up photos under direct, even lighting, especially at post-to-beam connections, louver pivot points, and gutter-to-post transitions. If the supplier only offers wide-angle shots, ask why.
What should I check in the factory's packaging photos to prevent shipping damage to my profiles?
We learned this lesson the hard way in our early export years. A perfectly made pergola means nothing if it arrives at the job site with dented beams, scratched coatings, and missing screws. Now packaging is one of the most photographed stages in our production process, because our buyers demand to see it.
Check packaging photos for individual profile wrapping with protective film, foam or cardboard edge guards on all corners, secure strapping that prevents shifting, clearly labeled component boxes, and a packing list visible in the photo. Proper internal bracing and custom crate dimensions that match the profile lengths are the strongest indicators that your shipment will arrive damage-free.

The Real Cost of Shipping Damage
A single dented beam can delay an installation by weeks. The contractor waits. The homeowner gets frustrated. And the replacement part has to cross an ocean again. For a distributor or purchasing manager, this is not just inconvenient. It erodes trust with your end customer and eats into your margin. That is why the visual inspection of packaging matters just as much as the inspection of the product itself.
What Good Packaging Looks Like
When we prepare a shipment, every profile gets wrapped in protective PE film. Corners receive foam guards or cardboard angles. Long beams are separated by wooden battens so they do not rub against each other during transit. All hardware, screws, and connectors go into labeled bags inside a separate box. The entire package is strapped and braced inside a plywood crate that matches the exact dimensions of the contents.
Red Flags in Packaging Photos
Here is what to watch for when reviewing your supplier's packaging photos:
- Profiles stacked directly on top of each other without separators
- No visible protective film on coated surfaces
- Loose hardware thrown into the main crate instead of organized bags
- Crate dimensions that look much larger than the contents, allowing movement
- No visible packing list or labels on the outside
- Cardboard-only packaging for heavy aluminum profiles shipped by sea
The Missing Hardware Problem
One of the most common complaints from our European buyers, before we improved our system, was missing small components. A non-standard connector, a specific gasket, or a handful of self-tapping screws. These tiny parts are cheap but impossible to source locally. Now every order leaves our factory with a photographed and itemized hardware kit. We send those photos to the buyer before the container is sealed. This simple step has virtually eliminated missing-part complaints.
Ask for Pre-Shipment Packaging Photos
This is standard practice among quality-focused suppliers and should be a non-negotiable part of your sourcing process 10. Request at minimum three types of photos: open crate showing profile arrangement, close-up of corner protection and separators, and a shot of the labeled hardware kit. If a factory resists this request, consider it a warning sign.
Container Loading Matters Too
Even perfect packaging fails if the crate shifts inside the container. Ask whether the factory uses container bracing, whether pallets are secured to the container floor, and whether the loading plan accounts for weight distribution. A photo of the loaded container, with crates snug against each other and braced at the door end, gives you confidence that the last mile of the journey is protected too.
Conclusion
Visual inspection is your most accessible and powerful sourcing tool. By checking coating quality, wall thickness cues, joint precision, and packaging standards, you screen out problems before they become costly. Trust your eyes first, then verify with data.
Footnotes
1. Explains the automated control of machine tools by computers. ↩︎
2. Provides a comprehensive overview of the powder coating process. ↩︎
3. Explains environmentally friendly methods for preparing aluminum surfaces before coating. ↩︎
4. Describes the properties and advantages of polyester-based powder coatings. ↩︎
5. Official international quality label for architectural aluminum coatings. ↩︎
6. Explains how wind and snow loads are calculated for structural design. ↩︎
7. Details standard dimensional tolerances and specifications for aluminum extrusions. ↩︎
8. Defines the engineering concept of a structure's ability to withstand loads. ↩︎
9. Details the logistical and cost-saving benefits of disassembling products for transport. ↩︎
10. Outlines the structured approach for identifying, evaluating, and selecting suppliers. ↩︎